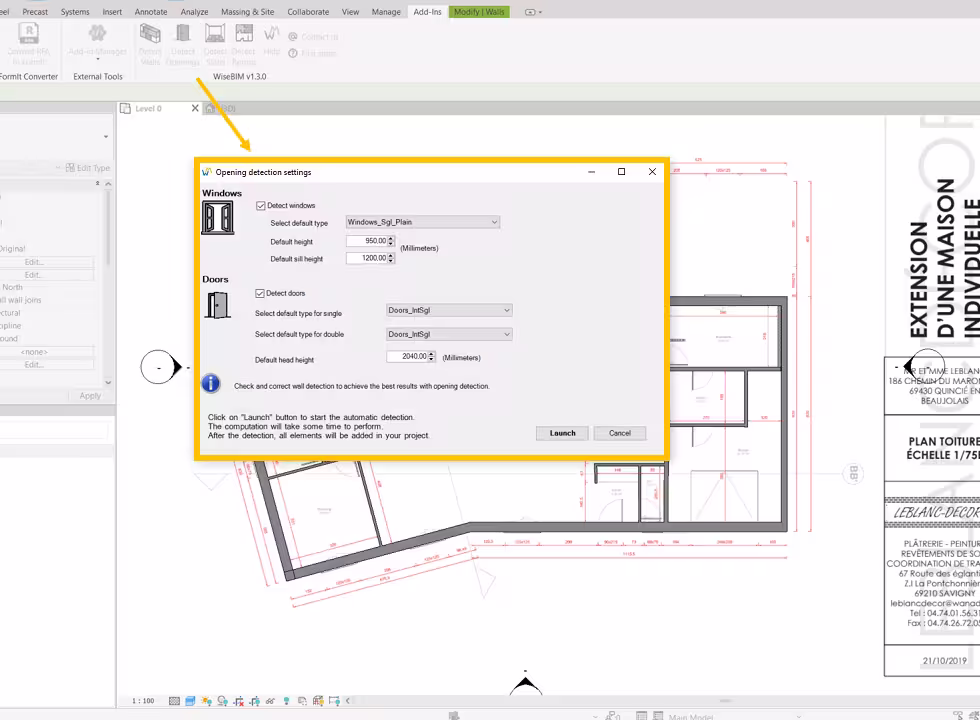
Setting opening detection parameters
Before initiating the openings detection process, it is necessary to check the walls geometry.
To initiate the detection, the user should select the image plan and use the detection function in the add-in panel. A pop-up window is displayed to set some parameters to confirm which elements are to be detected and what default values should be applied to reconstruct the elements.
Windows: You can choose not to detect windows by unchecking the box in the first row. It is also necessary to choose the default type for representing windows. Types are created based on the selected one depending on the length of the opening. Default values for sill height and opening height are applied to all detected windows. Therefore, it is recommended to initialize these values by selecting the ones most frequently found in the plan.
Doors: You can choose not to detect doors by unchecking the box. Then, choose the default type for representation for single door and for double or large doors. The only elevation parameter is the default height under the lintel.
Afterward, once the elements are created in the project, it is possible to change the family for one or more elements through the display of classic properties.
In case no family/type is available in the project, elements cannot be detected, so it is not possible to modify the parameters. In this case, it is recommended to cancel the detection, then import a family into the project in the missing category.
Once the parameters are finalized, initiate the detection process by clicking on the Launch button.